T H E   F L A M E   T R E E   B L O G

The Expert Advice, Made Easy Blog

Twitter Made Easy: Business Promotion

Posted by Matt Knight

made easy, expert advice, twitter tips, social media networking, Twitter is not just a great platform for brand building; thanks to its reach, it is also the ideal way to announce new products, promote your business and direct customers to product pages.

Let our expert advice made easy help guide your business into gaining a wider audience in the Twittersphere.

Using Twitter for Promotion

A single tweet can reach millions of people, making it as potent as TV advertising when it comes to promotion – and tweeting costs nothing. Therefore, if you have something to promote, whether a product or service, Twitter is the ideal tool. However, there are drawbacks to promoting on Twitter, and many people fail to use the platform correctly.

made easy, twitter tips, social media advice,

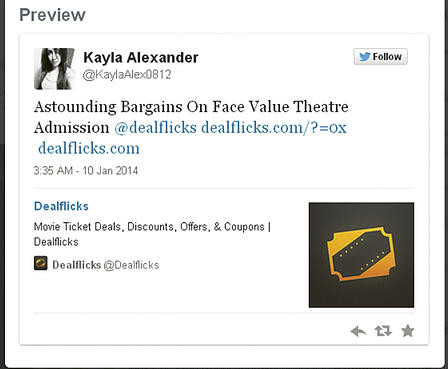
Including a promotional link in your tweet is a great way of attracting your customers to a particular product or offer.

Balance

People will soon tire of you if you just send out tweet after tweet promoting your products or services. Users expect a little promotion, but if that is all you are doing, you will simply cause them to unfollow you. You need to get the correct balance between putting out engaging and useful content, and promotional material. While there is no hard-and-fast rule, it is perhaps not a good idea to send out more than one promotional tweet for every three tweets that contain non-promotional content.

  • Hot Tip: Try to include powerful and evocative words, just as headline writers do. The more you can grab a reader’s attention, the more likely it is that they will click on your link.

Tweeting Promotional Content

With just 140 characters, you cannot use a tweet as a sales pitch. The key to promotion on Twitter is to drive traffic to your website or sales page using a link. However, in order to get people to click your link, you will have to be creative.

  • Benefits: Rather than try to sell a product in a tweet, outline a main benefit.

  • Tease: Tempt users to click a link by making them want to know more about your product. 

  • Reward: Offer discounts or freebies to make Twitter users feel privileged.

made easy, twitter tips, social media advice,

Think before you type: make your promotional tweet sound too good for people to resist.

Composing Promotional Tweets

A promotional tweet has to centre on your link. Even if you are using a link shortener, space is going to be at a premium, so you need to compose your message as concisely as possible. 

Social Media Tools

All sorts of tools and Twitter clients can help you with your promotional efforts. Many of these allow you to do things that you simply cannot do using Twitter’s main interface. 

Using Twitter Clients

Twitter clients have some useful tools for promotion: 

  • Scheduling tweets: Send out your promotional tweets when your Twitter users are most active.

  • Automating tweets: Automatically generate tweets whenever you have a new product or service to promote, or send automatic responses to tweets when you are not online.

  • Multiple accounts: Manage several accounts at once.

  • Group: Separate your customers from your other Twitter followers.

Useful Twitter Clients for Promotion

We have covered some of the best Twitter clients in Chapter Five (see pages 174–78), but some of the most useful for promotion include the following: 

  • TweetDeck: Twitter’s own desktop client that has plenty of tools useful for promotion.

  • HootSuite: One of the most popular Twitter clients available – and essential for any business managing multiple social media accounts.

  • Zendesk: Lets you search for relevant content and import tweets into your business software.


ncluding a promotional link in your tweet is a great way of attracting your customers to a particular product or offer. 

Advertising on Twitter

If you really want to reach large numbers of people and tap into the huge audience potential of Twitter, you may consider Twitter advertising. Twitter offers businesses three types of advertisements, so it is important to choose the platform that you think will be most effective for your brand building. 

  • Promoted accounts: Appear on people’s # Discover page as Twitter suggestions of accounts worth following.

  • Promoted tweets: Appear on users’ timelines with their other tweets.

  • Promoted trends: Appear on the list of trending topics.

Promoted Accounts

Promoted accounts are useful for building up a larger following. You can select the people you want to reach according to their interests, location or even gender. This ensures that you are only recommended to users who are likely to want to follow you.


made easy, twitter tips, social media advice, Promoted Tweets

These appear in people’s Twitter feed. However, you can target users according to their interests, to specific keywords they have tweeted or to their location, thus ensuring that you are only advertising to people relevant to your brand. 

Promoted Trends

Useful for promoting projects or campaigns that you are running, promoted trends mean that your trend will appear at the top of certain users’ trending topics. Again, you can target the people who will see your advert and your promoted trend lasts for 24 hours.

How Twitter Advertising Works

Twitter’s advertising prices are based on pay-per-action (PPA). This means that you only pay when a person follows your account (promoted accounts), replies, retweets, favorites or clicks a link in your tweet (promoted tweets), or clicks your promoted trend link. This pricing system is based on bidding, which means that you set the maximum amount you are willing to spend per follow or click. 

There are several stages to advertising on Twitter:

  1. Visit https://business.twitter.com/ad-products, and click the Let’s go! button, as shown to the left.

  2. Select your business location from the drop-down menu and your estimated monthly digital advertising budget.

  3. Fill in details of your business and advertisement.

  4. Choose the type of Twitter advertisement you would like.

  5. Choose how you would like to target your tweets, such as by keywords or interests and followers.

  6. Set a daily budget for your campaign (Twitter will stop showing your ads once you hit that figure).

  7. Place a click-through bid.

  8. Select a date for your promotion to begin.

Links

Expert advice made easy, blogging, photoshop, social media, twitter

Topics: social media advice, expert advice made easy, made easy, twitter tips

Twitter Made Easy: Setting Up A Business Profile

Posted by Matt Knight

twitter made easy, made easy, twitter for business, social media advice, For a business, the Twitter profile is crucial to get right. It is your opportunity to explain to the Twittersphere who you are and what you do. It is also important if you want to build your brand identity, as it helps to distinguish you from the competition. Let our expert advice made easy help you create the Twitter profile that will serve your business best. 

Twitter Handle

As with all users on Twitter, a business needs a unique username. Of course, in an ideal world, this should be the name of your company. However, due to Twitter’s popularity, another business or user may have already taken your desired name. This means that you will need to come up with an alternative, but it should be something that is identifiable with your brand.

  • What you do: If you cannot use your company name, choose a username that describes what you do, such as @onlinePCrepairs. 

  • Add your location: If you find that your company name is already in use, adding where you are based might allow you to include your business name in your Twitter handle, e.g. @LondonPCrepairshop.

twitter made easy, made easy, twitter for business, social media advice,  

If your desired username is taken, chose an alternative that enables your customers to identify your buisiness, such as your location. 

  • Hot Tip: Try to keep your Twitter handle short and choose something easy to spell. Also, remember that you cannot use spaces and, as people often use mobile devices, avoid punctuation to make it simple to type.

Using Personal Names

People prefer speaking to actual individuals on Twitter rather than companies. For this reason, it is often a good idea to attach a name to your Twitter handle, such as @PCshopjohn, which can add that personal touch. This is especially effective if you intend on having more than one person tweeting, as each individual can have his or her own Twitter account.

Company Name

Along with your Twitter handle, you will need to add your company name to your profile. There are no limits to how many people can use the same company name, so you do not have to worry about somebody else having the same business name as you. As your company name is what will appear next to your tweets, choose your normal brand or trading name so that people will be able to identify you.

 twitter made easy, made easy, twitter for business, social media advice,

As an established business, MacWorld are lucky to have been able to use their company name as their Twitter handle; newer businesses may not be so fortunate. 

Profile Images

Remember that Twitter lets you upload two types of image to your profile, and it is important to take advantage of both.

  • Profile photo: Use either your company logo or a headshot if you intend to include individual names in your Twitter handle. 

  • Header image: This could also be your logo, albeit enlarged, or it could be a custom design using your branding colours. It could even be an image of one of your products.

Profile Background

You want your profile page to be as appealing as possible. This means taking advantage of Twitter’s many customizable features, including using a profile background. Ideally, you should design your own and upload it. Many companies now specialize in creating bespoke Twitter backgrounds, but if you do it yourself, use your company branding and keep it simple.

  • Hot Tip: Make sure that your logo, profile header and background all go well together. Overdoing the use of your logo or brand colours can make a profile look garish.

 twitter made easy, made easy, twitter for business, social media advice,

When it comes to designing your profile background, follow the example of successful brands, and keep it simple. 

Company Biography

Your biography is the one chance you get on Twitter to explain to potential followers who you are. With only 160 characters, you should not waste space by including mission statements or your business philosophy. Keep to the point and explain what you do.

  • Location: Make sure that you fill in your location so people can find you. Be specific, as your Twitter followers may be from another country and therefore not know your local area. 

  • Benefits: Try to explain the benefits of your products or services, such as convenience, low cost or high quality. 

  • Approachable: Try not to come across as too formal. You want to sound friendly, personable and approachable, yet remain professional.

 twitter made easy, made easy, twitter for business, social media advice,

When you write a profile bio, ensure that you include keywords applicable to your business, so that you can be found easily through search engines. 

Keywords

Your Twitter profile is searchable outside of Twitter. In other words, people may come across it when using Google or other search engines. Therefore, try to include a couple of keywords in your profile which will make it as search-engine friendly as possible, thus giving you a better chance of appearing high up in the rankings.

Website

You need to take advantage of the fact that Twitter lets you include a link in your profile. However, you need to decide where you are going to send your Twitter followers when they click this link.

  • Hot Tip: Consider creating a specific Twitter landing page, where you can provide information tailored especially to your followers. This will also help you to monitor your web traffic more effectively.

 twitter made easy, made easy, twitter for business, social media advice,

A Twitter landing page is designed specifcally for people who have come through to your website from your Twitter profile, such as this money-making blog. 

Using Links

Before you include a link, consider your followers and what they will want to see, as well as what you are trying to achieve with your Twitter marketing. Remember that social media is not a sales tool and people may be after more information rather than wanting to place an order. Therefore, rather than sending people to a sales page or your main landing page, consider using a link to a blog or an ‘About us’ page. Some businesses do include an additional URL in their biography and, although this will not be a clickable link, it can be copied and pasted into a browser.

Links

  • Check out 16 creative ways to use Twitter for business here.

  • Have a look at 5 must-have Twitter tools here.

  • Make sure your business stands out by using these 4 Twitter search tricks.

Expert advice made easy, blogging, photoshop, social media, twitter

Topics: expert advice made easy, twitter tips, everyday twitter

Twitter Made Easy: Making the Most of It

Posted by Matt Knight

made easy, twitter tips, online social media, online advice, online communities, Beyond the basic elements, Twitter has many useful features that can help you to maximize your experience. This article discusses some of the best ways to utilize Twitter, as well as how to handle some of the negative aspects of using social media.

Using Twitter

Once you start getting to grips with Twitter, and are tweeting, replying and mentioning others in your tweets, you will find that there are additional useful features that you can use to engage with other users. Using Twitter can go beyond just regular tweeting and replying, and you will find many different ways of socializing, promoting or finding useful information.

Favorite Tweets

Sometimes, you might come across a tweet that you want to read later. Twitter provides you the facility to ‘favorite’ a tweet, which places it in your ‘Favorites’ folder, located on the Me page on your Twitter interface. The person who wrote the tweet can see who has favorited it on their @ Connect page. There are several reasons why people favorite tweets:

  • Save for later: If a tweet has a useful link that you do not have time to visit there and then, you can favorite it so that you can find it again easily later. 

  • Showing appreciation: When you favorite a tweet, it lets the user know that you liked what they tweeted. 

  • Draw a user’s attention: Favoriting somebody’s tweet can help to get you noticed by the person who posted it, who may decide to follow you.

made easy, twitter tips, online social media, online advice, online communities,


How to Favorite a Tweet

  1. Hover your mouse over the tweet you want to favorite. 

  2. Click Favorite. A yellow-bordered star should appear in the right-hand corner of the tweet. 

  3. You can un-favorite a tweet by clicking the Favorite button again, and you will see the yellow-bordered star disappears. This will remove the tweet from your Favorites list.

  • Hot Tip: If somebody tweets something that you enjoyed, but you do not think it is suitable to retweet to your followers, favorite it to show your appreciation to the original poster.

Topic Searching

With over 200 million users constantly tweeting about everything and anything, Twitter contains a wealth of useful information. However, with so much traffic, gaining access to what you want is not easy. Thankfully, Twitter’s search function is a useful tool for finding the information you need, and you can use it in several ways:

made easy, twitter tips, online social media, online advice, online communities, People: Use the @ symbol to find Twitter handles or  simply type in a person’s name. 

Keywords: Enter the keywords to obtain a list of tweets containing that topic. 

Hashtags: A more direct and easier way to gain the information you want.


Making Searches on Twitter

Twitter’s search engine has some useful features to help you find the information you want.

  • Suggestions: When you start typing, Twitter will make suggestions based on the most popular topic searches. 

  • Fluid searching: As people are constantly tweeting, when new results come in, Twitter will alert you to the new tweets at the top of the search results page.

Search Limitations

The biggest problem with making Twitter searches is the sheer volume of tweets in the archive. Since it is impossible to list everything, you may find that most searches are limited to just the last few days or weeks.

Advanced Searching

For a more specific search, you can use Twitter’s advanced search feature, located at https://twitter.com/search-advanced, which allows you to be more specific with what you are looking for. For example, you will be able to include and exclude certain keywords and hashtags or specify people and locations for Twitter to search.

Trending

Another great tool for finding information – particularly things that are currently happening in the news – is Twitter’s trending topics. Trends, which can be seen on the left-hand side of your Twitter feed, are the most commonly tweeted-about subjects at any given time. They are based on both keywords and hashtags, and are often a great way to determine what is going on in the world.

Tracking Topics and Trends

You can take advantage of various third-party services that can help you to track certain topics and trends. These are particularly useful if you are using Twitter for research or business promotion, as they allow you to receive the very latest news and discussions on certain topics. Here are some of the most useful ones for tracking trends and topics:

  • hashtags.org: A website that shows you the most popular hashtags. 

  • HootSuite: Lets you track topics and receive the latest tweets containing certain keywords. 

  • twitter.com/Trendrr: Allows you to track trends and keywords.

Expanded Tweets

Although tweets are meant to be just 140 characters, Twitter now includes an expanded tweet system, whereby if you tweet a link to a certain web page from one of Twitter’s partner sites, Twitter will automatically summarize a version of the web page beneath the tweet. This allows you to see content previews and images, and even to play videos. Some of the partner sites you can link to include the following:

  • Dailymotion: When you link to a video on Dailymotion, a Twitter user can expand the tweet and watch the video. 

  • Amazon: If you send a book link, Twitter users can expand it to see the cover and summary. 

  • Time: Post a link to an article on Time magazine and Twitter users will see a preview of the page. 

  • Newspapers: Expanded tweets also include links to news stories in the Wall Street Journal and other popular online newspapers.

Expanding a Tweet

  1. An expanded tweet will contain a link saying: View summary or, in the case of a video, View media. 

  2. Click the link to expand the tweet. 

  3. Click Hide summary/Hide media to shrink the tweet again.

  • Hot Tip: Expanded tweets should not be confused with the Expand link on the bottom of most tweets, which is a feature that lets you see more details about the message.

Tweet Details

made easy, twitter tips, online social media, online advice, online communities,

Your Twitter feed contains the most essential elements of tweets, namely the content. However, you can see other details, such as the time and date when the tweet was sent, if you click the link that says Expand. If a tweet is a retweet, this feature also shows the number of retweets and favorites that the person who originally posted the message has, and pictures of some of their followers you may wish to follow.

Following Discussions

Often, you may come across a reply to a tweet and be interested in following the discussion; thankfully, Twitter makes it easy for you to follow conversations. If a tweet is a reply, it will contain a ‘View conversation’ link which, when clicked, will show the tweets in that conversation. These may include messages from a number of different people engaged in the discussion.

Tweet Chats

Thanks to the ability to interact with large numbers of people in real time, Twitter is a great place to hold discussions, forums and Q&A sessions. Tweet chats are usually arranged in advance at a specific time, when a Twitter user will host a conversation enabling those interested to ask questions and discuss certain topics.

  • Hot Tip: If you host a tweet chat, come up with a hashtag that users can include to filter all tweets into one conversation and which will make it easier for people to get involved.

made easy, twitter tips, online social media, online advice, online communities,

Tweet Permalink Page

All tweets have their own webpage, as do conversation streams. If you click ‘Expand’ or ‘View conversation’, you should see a ‘Details’ link next to the time and date when the tweet was sent. If you click this link, you will be taken to the tweet’s unique page, where the message will appear much larger and you will be able to see all details and replies to it.

Sharing Tweets

Tweets are very easy to share; you can send links to them by copying and pasting the URL from any tweet permalink page. In addition, you can share a tweet by email.

  1. Click the More link on the bottom right of the tweet you want to share. 

  2. Click ‘Share via email’. 

  3. In the pop-up window, enter the email address of the person you want to send the tweet to. 

  4. Add a comment if you wish and click the box to include or exclude your own email address. 

  5. Click ‘Send email’.

made easy, twitter tips, online social media, online advice, online communities, Integrating Twitter with Facebook

While Twitter is incredibly popular, Facebook is still the world’s number one social media platform. Fortunately, it is easy to integrate your Twitter feed with your Facebook account. You can automatically post tweets to your Facebook wall or to your fan page, which means that all your Facebook friends and fans can see everything you tweet, even if they are not on Twitter.

Including a Twitter Feed on Facebook

  1. Log into Twitter, click Settings (in the gear wheel menu) and then click Profile. 

  2. Scroll down and click Connect to Facebook and link your accounts 

  3. In the pop-up window, sign into Facebook. 

  4. Select where you want your tweets to appear, such as your timeline or profile page. 

  5. Click OK. Your tweets will now appear on Facebook, along with your Twitter handle.

Integrating Twitter with LinkedIn

If you are using Twitter for business, you can also automatically tweet your LinkedIn status updates.

  1. Log into LinkedIn and go into ‘Account & Settings’ (top right: the person icon). 

  2. Click ‘Privacy & Settings’. 

  3. Click the ‘Manage your Twitter settings’ link. 

  4. Click ‘Add your Twitter account’, and enter your Twitter username and password or, if you are already logged in, click ‘Authorize app’. 

  5. Click ‘Save changes’.

made easy, twitter tips, online social media, online advice, online communities,


Email Notifications

In order to help you keep track of your interactions, Twitter can send you email notifications so that you do not miss that all-important tweet, reply, direct message or mention. You can receive an email for all sorts of things.

  • Favorites: You can receive a notification when somebody favorites one of your tweets or a tweet that mentions you. 

  • Mentions: Twitter will email you if you are mentioned in a tweet. 

  • Retweets: Whenever one of your tweets is retweeted, Twitter can let you know. 

  • Direct messages: If somebody sends you a DM, you can read the message in your email rather than logging in. 

  • Replies: Email notifications let you know if somebody has replied to a tweet. 

  • Followers: If you have a new follower or somebody from your email address book joins Twitter, you can be notified.

Turning Notifications On/Off

You can turn all notifications on or off, as well as receiving notifications tailored to you (from your followers) or relating to any interactions.

  1. Go into the Settings menu (gear wheel icon on the top right). 

  2. Click on ‘Email notifications’ on the sidebar. 

  3. Check the relevant box to turn on a particular email notification and uncheck to turn it off. In the drop-down menu, choose whether to receive notifications from interactions from ‘Anybody’ or ‘Tailored for you’. 

  4. Click Save changes to save your preferences.

Automated Tweets

Twitter is a platform for people, not robots, but many tweets you will come across are automated. Automation can be useful, but it is very easy to overdo it. In addition, Twitter has some guidelines about automated tweets regarding things you should and should not do:

Using Automation

Twitter accepts that it is fine to automate some things.

  • Feeds: Twitter does not mind if you automate blog feeds or status updates from other social media platforms. 

  • News and weather: Automated tweets that provide useful information to Twitter users are also fine. 

  • Updates: If you have posted a video on YouTube or written a new blog post, it is OK to send an automated tweet about it.

Automated Account Actions

Twitter does not like it when you automate certain account actions:

  • Replies and mentions: Do not automate replies and mentions, as this can get your account suspended. 

  • Retweets: Automated retweeting is also against Twitter’s guidelines. 

  • Following: Accounts that use automation to follow and unfollow people may also be suspended.

Spambots

Due to the ease of automation on Twitter, spambots (software that sends tweets) are a common problem. Often, these copy tweets from real people in a bid to appear human. If you think a spambot is sending you messages, you can report it by using the ‘Report Tweet’ link in the More drop-down menu at the bottom of the tweet.

Links

Expert advice made easy, blogging, photoshop, social media, twitter

Topics: expert advice made easy, twitter tips, everyday twitter

Twitter Made Easy: Composing an Effective Tweet

Posted by Matt Knight

expert advice made easy, made easy, twitter tips, social media advice, So you have a twitter account and you're happy so far. You follow interesting people and interact with them as much as possible. But why aren't your tweets getting as much attention as others? Let our expert advice made easy outline the ways in which you can utilise Twitter as both a fun social distraction and a powerful media tool. 
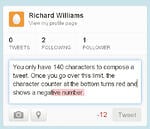
Composing Your Tweet 

Once you have signed up to Twitter and created your profile, it is time to send your first tweet. This can be daunting. After all, what on earth do you say? And how do you actually compose and send it?

The Compose Box

When you send a tweet, you write it in the compose box, which can be accessed in two ways. You can either click the box on the left of your Twitter homepage, where it says ‘Compose new tweet’ or you can click the blue icon on the top right-hand side (the one that looks like a quill), which can be clicked no matter which page you are on. 

Character Counterexpert advice made easy, made easy, twitter tips, social media advice,

Since all tweets have to be fewer than 140 characters, the compose box contains a counter on the bottom right. This starts at 140 and if you exceed the limit, it turns red and will have a minus sign, showing how many characters you have exceeded the limit by. In some browsers, the excess characters will also be highlighted.

  • Hot Tip: Before you start tweeting, you could retweet what other people have been saying so that you can get used to Twitter and also introduce yourself slowly to the Twittersphere.

What to Tweet About

Perhaps the most challenging aspect of Twitter for a new user is knowing what to say. The first few tweets are always the hardest, but once you start tweeting, it soon becomes second nature. The great thing about Twitter is you can say almost anything. Here are some ideas.

  • Introduce yourself: For your first tweet, why not introduce yourself to the Twittersphere?

  • News: Comment on something interesting that you have seen in the news.

  • Entertainment: Tweet about a film you have seen, book you have read or album you have listened to.

  • What you are doing: If you are doing something interesting, let the Twittersphere know.

  • Send a link: Link to something interesting you have seen on the internet.

Cramming it All in

The second most challenging aspect of tweeting for beginners is getting down what you want to say in just 140 characters. In order to tweet successfully, you need to learn how to write concisely and edit your tweets until they are the right length.

expert advice made easy, made easy, twitter tips, social media advice, Tweet Editing

Perhaps the simplest way to learn how to edit down a tweet is to write out exactly what you want to say, ignoring the 140-character rule, and then go back and cut down your text so that it fits.

  • Abbreviations: Use common abbreviations where possible. 

  • Symbols: Use common symbols, such as ‘&’ instead of ‘and’.

  • Cut: Remove extraneous words, such as adverbs and modifiers. Instead of saying: ‘This website is very interesting’ just write ‘This website is interesting’.

  • Reorganize: Rejig your sentences so that they use as few words as possible. 

  • Spaces: Try removing spaces after commas and stops.

  • Word length: See if you can use a shorter word instead of a longer one.

  • Twitter Speak: Learn the common Twitter phrases and abbreviations to save space.

Sending Your First Tweet

That first tweet can be the most daunting, but once it is out of the way, you will be surprised at how quickly you get accustomed to talking to the Twittersphere. Additionally, sending a tweet is incredibly simple:

  1. Click the compose box and type in what you want to say.

  2. If necessary, edit down your tweet until the character counter turns black and is not showing minus numbers.

  3. Press ‘Tweet’. Your tweet is now live.

Location-based Tweetsexpert advice made easy, made easy, twitter tips, social media advice,

Twitter has a feature that allows you to add your location to your tweets. Although it can be a good idea to let people know where you are if you are travelling around or communicating to people in other countries, you may not want to broadcast your location if you are away from home and your house is empty. 

Turning Tweet Location On and Off

You can set your tweet location on and off in your settings (that's another post), but also in individual tweets:

  1. Compose your tweet as normal.

  2. Click the pin-shaped location icon next to the camera icon on the bottom of the compose box. A box will appear asking whether you want to include a location in your tweets. 

  3. Press the blue ‘Turn location on’ or click the ‘Not now’ link.

  4. Send tweet as normal.

expert advice made easy, made easy, twitter tips, social media advice, Deleting a Tweet

When you send a tweet, it is visible for the whole world to see, but if for some reason you wish to remove it from the Twittersphere, you can. Remember, however, that you cannot delete tweets that other people have retweeted.

  1. Click ‘Tweets’ on the top left of the compose box.

  2. Find the tweet that you want to delete.

  3. Hover your mouse pointer on the tweet and click the Delete link when it appears.

Protecting Your Tweets

When you send a tweet, it is not just your followers who get to see it; anybody can find it in a search, retweet it and spread it around the Twittersphere. This means that a tweet can reach thousands and even millions of individuals. However, some people just wish to use Twitter as a place to connect with their friends and do not want their messages visible to the entire world. Twitter enables you to protect tweets so that only your followers can see them.

Making Your Tweets Private

  1. Go into your Security and Privacy settings (click the gear wheel icon, select Settings and click ‘Security and privacy’).

  2. In the ‘Tweet privacy’ section, tick the box beside ‘Protect my Tweets’.

  3. Click ‘Save changes’ at the bottom of the page. Twitter will usually ask for your password to confirm the changes.

  • Hot Tip: If you protect your tweets, your followers cannot retweet them, and anybody who wants to follow you or see your messages will need your approval first.

This article is based on an extract from our bestselling book Everyday Twitter: Made Easy (ISBN: 9781783612345). Have a look at it on Amazon here.

Links

Expert advice made easy, blogging, photoshop, social media, twitter

Topics: social media advice, expert advice made easy, made easy, twitter tips

Running Made Easy: Winter Clothing

Posted by Matt Knight

MADE EASY, RUNNING TIPS.

Many new runners are reluctant to head out when the seasons change for the worse, but running on a cold, bright winter’s day has its own charms. Even running in rain and snow can be hugely invigorating and, as long as your clothes are fit for the weather, you will quickly discover the joy of year-round training. Besides being comfortable, winter running gear should serve two purposes: it should keep you at just the right temperature and keep the weather on the outside. 

Temperature Control

One of the most common mistakes – even amongst experienced runners – is overestimating how cold a run will be. Put on multiple layers of clothing, hats, gloves and even scarves, and you’ll regret the decision within a mile or two. Modern sports materials are designed to regulate your temperature; this includes the ability to trap warm air between the skin and the clothing, which acts as an inbuilt thermal layer.

  • Top Tip: When you start a winter’s run, you should just be able to feel the cold. Feeling warm as soon as you set out is a sure sign of overheating ahead. 

MADE EASY, RUNNING ADVICE, 

Base Layers

In extremely cold conditions, particularly when there is a biting wind, consider wearing a base layer beneath your running top. However, you should make sure that each layer has good breathability and that the layer closest to the skin can still effectively wick away sweat.

Top Layers

If a base layer feels too warm, try a light running jacket over your top instead. Many of these are designed to reduce the impact of cold winds and have the added advantage that they can be unzipped for ventilation as required. A degree of waterproofing in jackets is also typical, but do not expect the kind of full protection a much heavier hiking jacket would provide. Getting wet (often through to the skin) is all part of winter running, but as long as your tops, shorts and socks have comfortable seams, this should not be a problem.

Running Made Easy, winter clothing

  • Top Tip: Some winter running jackets have additional vents that can be unzipped either at the sides or under the arms to tailor the amount of heat they retain.

Wet Winter Feet

Some running socks incorporate a fully waterproof layer or membrane. These work exceptionally well if you run in shoes with plenty of mesh (generally lighter-weight shoes), but be aware that if water does get inside – for example, over the top in deep puddles – it will be trapped inside and may cause blisters. It is usually better to just choose slightly thicker, well-wicking socks and avoid puddles as far as possible! Socks made from a mix of merino wool and silk are particularly luxurious; consider buying a spare pair to pamper your feet.

running made easy, wet weather 

Gaiters

Waterproof gaiters, similar to trail gaiters but made from water-repellent materials, can be useful on wet runs to stop water trickling down the legs and into the tops of shoes or soaking the tops of your socks.

This post is based on an extract from our bestselling book, Running by Justin Bowyer (ISBN: 9780857753892) – where you can find more on the above and further help and advice on running. Have a look on amazon by clicking here.

Links

  • There is some further advice for running in the cold here.

  • Check out some useful tips for running in the snow (with pictures) here.

  • To keep up-to-date on our latest posts and download a free Made Easy ebook click the link below and sign up.

Expert advice made easy, blogging, photoshop, social media, twitter

Topics: running equipment, Winter clothing, expert advice made easy, running tips, running advice, running

Running Made Easy: The Anatomy of a Shoe

Posted by Matt Knight

made easy, running tips,

As winter recedes in wake of spring, you may find yourself willing to venture outside and get in shape for the summer. With useful tips and hints taken from our expert advice Made Easy series, let us help you prepare for your outdoor fitness plans. 

Modern running shoes are precision-built from a large number of individual components, each designed to perform a specific function and to work in harmony with each other. Manufacturers’ websites should detail all the technical aspects of their shoes. Our expert advice made easy helps translate this information into simple, digestable information.

Jargon-buster

Here are some of the main terms you will find when researching running shoes.

  • Eyelets: The holes that the laces run through.

  • Heel: The first point of contact for many runners. The heel is often rounded to aid forward motion and may be made of a variety of materials, from gel to air pockets.

  • Collar: The soft inside top rear of the shoe that supports the ankle and provides protection for the Achilles tendon.

  • Heel counter: A rigid, moulded support inside the shoe that cradles the heel.

  • Heel tab: This extends upwards from the heel counter at the rear of the shoe to hold the heel firmly in place. It often has a cutout area called an ‘Achilles notch’ to reduce direct pressure on the Achilles tendon.

  • Midsole: This provides primary protection from the impact force of each foot strike. Although the midsole is usually made of foam, some manufacturers use special gels or air pockets.made easy, running tips,

  • Outsole: The outsole is the bit that hits the ground (normally after the heel); it both provides structure to the shoe and gives traction on the running surface.

  • Quarter panels: These are the sides of the shoe. They may include a small piece of mesh to reduce weight and add ventilation.

  • Footbed: A removable insert that helps the shoe to fit snugly. It can usually be removed to aid drying.

  • Tongue: The tongue sits between the laces and the upper foot. It may be ‘gusted’ (connected at the sides) to reduce the amount of water that can get in.

  • Upper: This is the top part of the shoe that encases the foot. Like the quarter panels, these may incorporate a degree of mesh venting.

The Three Main Types

Besides specialist track shoes (with spikes), there are only three main types of shoe from which to choose: road, trail and the relatively new phenomenon of barefoot shoes. Each is designed for a specific purpose, so bear this in mind when making your decision. Seek impartial advice on the pros and cons of manufacturers and the latest designs by looking in running magazines and online forums.

Road Shoes

made easy, running tips,
Road shoes are especially designed for running on hard surfaces. Some may be suitable for a small amount of trail or off-road running, but the quickest way to destroy your shoes is by using them for anything other than their intended purpose. The road shoes you choose will depend on a wide range of variables, the most important of which is your natural running style. This should be checked and advised upon by a specialist retailer.

Avoid Fashion

The price of road shoes varies enormously, but expect to pay anything from £40/$60 to in excess of £100/$160. To some degree, you get what you pay for, but do not be fooled into simply thinking that the more you pay, the better the shoe. There is more than a dash of fashion in running, and you will always pay a premium for the big-name shoes and the latest designs. Many of these will be packed with a multitude of technical-sounding extras that often serve little purpose for the majority of day-to-day running.

Trail Shoes


running made easy
Trail shoes not only have to fulfil your basic needs in terms of cushioning and stability, they also have to perform a number of additional tasks, including protecting the toe and sole from uneven surfaces and delivering enhanced traction for wet and muddy conditions.

running made easy

Getting a Grip

Trail running inevitably means uneven and often wet terrains; your shoes need to be up to the job of keeping you upright and providing enough traction to move you forward. Different manufacturers use a range of tread styles to achieve this, ranging from quite flat car tyre-style treads to large studs (or ‘lugs’) or even additional metal spikes. Low-profile treads provide good all-round traction, but they are unlikely to stand up to the very worst conditions. Conversely, shoes with really large lugs (resembling football boots) will handle more gruelling terrain but can skid on firmer or more compact surfaces.

Trail shoes with low-profile lugs will allow some degree of road running to get you to the start of your off-road route. If you are likely to be running multi-terrain – a mix of trail, path and road – then choose a pair without large lugs.

Barefoot Shoes

running made easy
Nothing sounds more contradictory than a barefoot shoe, but over the last few years this running revolution has been transformed from a niche market – initially written off by many as a fad – to a massive industry with growing scientific backing. One of the sparks that ignited this quantum leap in shoe design was Christopher McDougall’s book Born to Run, a highly recommended read even for the most novice runner.

Natural Style

Barefoot shoes are little more than gloves for the feet, providing minimum padding against underfoot forces and, crucially, having no built-up heel, to encourage a more mid- to forefoot running style. This, proponents claim, is a more ‘biomechanically efficient’ way of running, far more in line with the way we were intended to run in an evolutionary sense. Research certainly seems to support this claim, and barefoot runners are undeniably evangelical about the advantages.

Links

  • Are you one of the ten types of runner often seen on the road?

  • You might enjoy this funny running story.

  • To keep up-to-date on our latest posts and download a free Made Easy ebook click the link below and sign up.

Expert advice made easy, blogging, photoshop, social media, twitter

Topics: running equipment, Expert Advice, expert advice made easy, running tips, running advice, running

Cycling Made Easy: Replacing a Worn Chain

Posted by Matt Knight

cycling made easy, cycling tipsChains will wear and ‘stretch’ over time, especially if not lubricated regularly. This can wear down the chainrings and cogsets leading to chain slippage, poor performance and possible accidents. In the next of our series on Cycling Expert Advice, Made Easy, we look at how to replace a worn chain.

Checking the Chain for Wear

Wear on the chain is caused by dirt getting into its joints, combined with the constant friction of contact with the sprockets. A chain wear indicator tool can be bought for less than £10, but you can simply use a ruler instead. Each chain link is made exactly half an inch long, so 12 inches from the centre of a link pin should be the centre of the 24th pin along. If the chain is longer by more than 1⁄16 inch, then it is time to replace it.

cycling made easy, measure chain

Replacing a Worn Chain

Check to see if the chain has a quick-release link (also called a snap link), which is a special type of link that can be fitted and removed without a chain tool. It looks different to the other links. If it does, you can pop it off by hand or with a screwdriver or other tool.cycling made easy, chain tool

Failing that, you will need to use a chain tool as follows:

  1. Place the bicycle on your work stand or lean it against a wall.

  2. Hook a short piece of electrical wire around the links on either side and over the link you are going to break. This will prevent the chain clattering onto the floor and the derailleur kicking up.

  3. Turn the screw handle of the chain tool anticlockwise until it stops. This will retract the chain tool’s pin so that you can fit the chain into the tool and align the chain tool pin with a chain link pin.

  4. Fit the chain tool around a link of chain that you are going to break. There are two slots for this on the chain tool. Use the one furthest from the chain tool handle. Using the nearest slot is for loosening only.

  5. Screw the handle clockwise until the chain tool’s pin touches the chain link pin. Make sure it is aligned and then continue to turn clockwise. There will be resistance but keep going until the pin is pushed out.cycling made easy, chain pin tool

    • If you are removing the chain to clean it and intend to put it back on again, push the link pin a little over half way through and retract the chain tool pin and remove the chain tool. Then take the chain in your hand and twist it a few times; it will come apart with the link pin still fitted in the outer link plate. This will make it easier to reattach by using your chain tool again to push the pin back through the plates.

  6. Your new chain will probably have more links than your old chain so these need to be removed using the chain tool. Before breaking the new chain, make sure you are clear about how the ends fit together. If you are using a pin you need an outer link on one end and an inner link on the other so that you can slot the inner link inside the outer and push the pin through with the chain tool. If you have a quick link (snap link), you need two inner links at either end of the chain as the quick link is an outer.

  7. Place the new chain over the bottom bracket, inside the chainrings, and over the small sprocket at the rear. Align the derailleur and feed the chain over the upper pulley, down and behind and under the lower pulley. Use your electrical wire to link the two ends together.

  8. Align the chain ends and, using the chain tool, screw the pin until it sits neatly through all four plates. Don’t forget to remove the electrical wire.

  9. The new join will be a little stiff, so work the link up and down and side to side a little, then lift the chain off the bracket and feed it onto the lowest chainring from underneath whilst pedalling backwards with your hand.

  10. Lubricate the chain and wipe off any excess.

This post is based on an extract from our bestselling book, Cycling by David North (ISBN: 9780857750969) – where you can find more on the above and further help and advice on Cycling.

Links

  • Check out an interactive map of Britain's best bike rides here.

  • Check out top ten tips to help you winter-proof your bike here.

  • If you want to know more tips and advice on choosing, riding and maintaining a bike, why not buy our Cycling book? Take a look here.

Expert advice made easy, blogging, photoshop, social media, twitter

Topics: Expert Advice, cycling, expert advice made easy, Bicycle maintenance

Cycling Made Easy: Brakes Maintenance

Posted by Matt Knight

cycling made easy, bike riderThere's no point cycling somewhere if you can't stop once you've arrived. In these cold winter months it is important to remain vigilant when maintaining your brakes. Follow our expert advice to ensure your brakes are kept in top condition and can be swapped out should you need to change them. 

Replacing Brake Pads

Release the brakes and remove the old brake pads with a 5-mm Allen key or, if you have cantilever brakes, you will also need an open 10-mm spanner. Fit the new brakes and align them to the wheel rim before tightening.

Replacing Brake Cables

There are two main parts to a brake cable: the inner wire and the outer housing. You can replace them independently of each other but this guide will deal with changing both together.

  1. Slacken the cable pinch bolt and draw the cable through after snipping off the end cap with wire cutters. If you have V-brakes, keep the metal tube (the noodle) and the rubber tube in a safe place as you will need to reuse them.

  2. Unscrew the adjustment barrel next to the brake levers by hand, and line up the slots in the barrel, the locking nut and the brake lever unit. The cable can now be lifted out. cycling made easy, brakes adjustment

  3. Cut your new cable housing (not the inner wire) to the same length as the old one with cable cutters. Attach the metal ferrules (rings) to one end.

  4. Wipe some oil onto the inner wire and slide it into the cable housing.

  5. Hook the nipple into the end of the brake lever and fit the inner cable into the slots in the lever unit and the barrel adjuster.

  6. Feed the other end of the inner cable through its fittings and fit the housing to its relevant attachments on the frame and at its terminals.

  7. Pull the cable tight through the pinch nut then tighten.Resizecycling made easy, brakes cable

  8. Make sure everything is in place and the brakes are centred and aligned. Make fine adjustments by turning the adjustment barrel by hand, then tighten the locking.

  9. Pull firmly on the brake lever several times to bed it in.

  10. When satisfied that all is in place and working properly, cut the free end of the inner wire, allowing some spare. Attach a cable end cap by pinching it over the cable with your pliers.

    cycling made easy, cable end cap

This post is based on an extract from our bestselling book, Cycling by David North (ISBN: 9780857750969) – where you can find more on the above and further help and advice on Cycling.

Links

  • Check out these tips for wet-weather cycling here.

  • For more information on bike maintenance, plus choosing a bike, equipment and clothing and much more, take a look at our book Cycling by David North. For a limited time only we are offering a 30% discount from our website here.

  • To keep up-to-date on our latest posts and download a free Made Easy ebook click the link below and sign up.

Expert advice made easy, blogging, photoshop, social media, twitter

Topics: cycling in cities, expert advice made easy, Bicycle maintenance, bike riding in rain

Cycling Made Easy: Cleaning and Lubricating

Posted by Matt Knight

expert advice made easy, cleaning bikeIt's raining, it's pouring, but there are still some cyclists who brave the road. In weather like this, cycling can be fun and blow away your cobwebs. However, it's important to make sure your bike is maintained to the highest possible standard so that you are safe on the roads. 

Cleaning and lubricating your bike will ensure it is kept in prime condition through the winter weather. Utilise our expert advice made easy and ensure that you clean before you lubricate, especially the chain, as oil will otherwise carry dirt deeper into the moving parts, doing more harm than good.

Cleaning the Frame

  1. Place your bicycle on the work stand, if you have one, or lean it against a wall. 

  2. Wipe the bicycle with warm water except for the chain and the parts it contacts. If the bicycle is very dirty, or for the dirtier areas, you can use a citrus degreaser. Leave it for two minutes and rinse off. Wipe off the moisture with a clean, dry cloth. 

  3. Apply polish or wax to the paintwork and any chrome parts if you wish. Wax will protect the paint and prevent chrome from rusting. Avoid getting harsh cleaning products on the tyres and brake pads. Also avoid getting lubricant or wax on the rims and brake pads.

expert advice made easy, parts of a bike

The Chain Drive

The key area to suffer wear is the chain and those parts it comes into contact with. Dirt is the prime culprit, so cleaning before lubricating is essential. Depending on the type of bicycle you have, there will be different parts with different names so, for the purpose of keeping this simple, I am calling the whole area the ‘chain drive’. This comprises the following:

  • The chain: This connects the pedals to the rear wheel.

  • The chainrings: These are the sprockets (cogs) by the pedals.

  • The cogset: This is the set of sprockets on the rear wheel.

  • Derailleurs: These are the attachments by the chainring and cogset that push the chain from one sprocket to another. 

Cleaning the Chain Drive

Most of the time you can clean this area whilst the chain is on the bicycle. You can buy a special chain cleaning tool if you wish, but the steps below use brushes and cloths.

  1. Place your bicycle on a work stand or upside down if you don’t have one. 

  2. Brush some clean, warm water into the chain and everything it has contact with – the chainrings, cogsets and derailleurs. Hold a damp cloth around the chain and pedal backwards. 

  3. Next make a fold in the cloth and work it, back and forth, in between the sprockets. Don’t expect to get all the dirt off at this stage.expert advice made easy, cleaning the chain

  4. With a clean brush, work some solvent or degreaser into the chain drive. Toothbrushes or nailbrushes are great for the chain, derailleurs and the tops of the sprockets, whilst a longer, stiff-bristled brush is ideal for getting in between the sprockets. Alternatively, use a clean cloth, folded and worked in between the sprockets. 

  5. Using some warm water, a clean brush and a clean cloth, remove any degreaser and dirt, making sure to get in between each chain link and the sprockets.expert advice made easy, lubricating the chain

  6. Finally, dry the whole area, and anywhere else that may have been splashed, with a clean, dry cloth.

This post is based on an extract from our bestselling book, Cycling by David North (ISBN: 9780857750969) – where you can find more on the above and further help and advice on Cycling.

Links

  • Read some further tips on how to be safe when cycling in the winter here.

  • For more information on bike maintenance, plus choosing a bike, equipment and clothing and much more, take a look at our book Cycling by David North here

  • To keep up-to-date on our latest posts and download a free Made Easy ebook click the link below and sign up.

Expert advice made easy, blogging, photoshop, social media, twitter 

Topics: cycling in cities, expert advice made easy, Bicycle maintenance

Cycling Made Easy: Repairing A Puncture

Posted by Chris Herbert

Made Easy, punctureWhether it's cycling to work or you're out on a bike ride for fun, you've no doubt experienced that feeling of your bike suddenly feeling very bumpy and looked down to see that one of your tyres is flat. You've got a puncture! If you've yet to experience this then you're very lucky, and to be honest it's probably just a matter of time before you do!

When it happens don't panic as we have the expert advice made easy so you'll be back on the road in no time - just follow these eight simple steps to dealing with a puncture.

Repairing A Puncture

  1. Remove the wheel and examine the tyre to see what might have caused the damage. If you do find something, remove it and mark the tyre with the small crayon or chalk that comes with your repair kit. If you don’t find any obvious cause for the puncture, just continue with the steps. If you're not sure how to remove the wheel, see our post on how to do this here.

  2. Ease a tyre lever between the tyre and the wheel rim, then press it down against the edge of the rim, taking care not to puncture the inner tube. This should lift the inner edge of the tyre out of the wheel well. Hook the other end of the lever around a spoke.

  3. Do the same with a second tyre lever about an eighth of the way around the rim but, instead of securing it to a spoke, slide it along the rim away from the first lever. This should bring the edge of the tyre all the way off. Now you can completely remove the whole tyre from the rim.

  4. Remove the inner tube from inside the tyre but leave the valve in the wheel. If you found a potential cause for the puncture and marked the location with a crayon, you will now be able to check the inside of the tyre for anything sticking through and look at the inner tube to see if there is a puncture at that point.

  5. Whether you found a hole or not, partially inflate the tube and hold it close to your ear and slide it through your hands, listening for a hiss. If you hear something but can’t identify the exact spot when you move it away from your ear, dab some water or spit on the tube in the approximate area and watch for bubbles. Alternatively, feed the tube under water in a bucket. When you have located the puncture, mark the spot with your crayon.Made Easy, marking puncture

  6. Dry the inner tube and roughen the area around the hole with sandpaper, then spread glue around the puncture covering an area a little larger than the size of the patch you are going to use. Leave the glue a few moments to become tacky.Made Easy, puncture patch

  7. Place the patch over the puncture, pressing it down firmly, before peeling off the plastic cover. Dust the area with grated chalk and wait five minutes to make sure the glue is properly dry, then replace the inner tube and tyre. Made Easy, puncture patch

  8. To replace the tyre on the wheel rim work the edge of the tyre over the rim with your hands, taking care not to pinch the inner tube at any point. Towards the end the tyre will become tightly stretched and you may need to use tyre levers to prise the last part over the rim. You can now inflate the inner tube fully.

This post is based on an extract from our bestselling book, Cycling by David North (ISBN: 9780857750969) – where you can find more on the above and further help and advice on Cycling.

Links

  • If you find you are susceptible to getting punctures take a look at some tips on how to avoid getting them here

  • For more information on bike maintenance, plus choosing a bike, equipment and clothing and much more, take a look at our book Cycling by David North here

  • To keep up-to-date on our latest posts and download a free Made Easy ebook click the link below and sign up.

Expert advice made easy, blogging, photoshop, social media, twitter

Topics: puncture repair kits, expert advice made easy, Bicycle maintenance