 A key part of home computing is sorting and viewing photos. Windows 8.1 is a fantastic way to enjoy your pictures but sometimes keeping on top of this digital deluge can be difficult. Don't let yourself become overwhelmed, today's blog helps get you started with photo management in Windows 8.1.
The Pictures Library
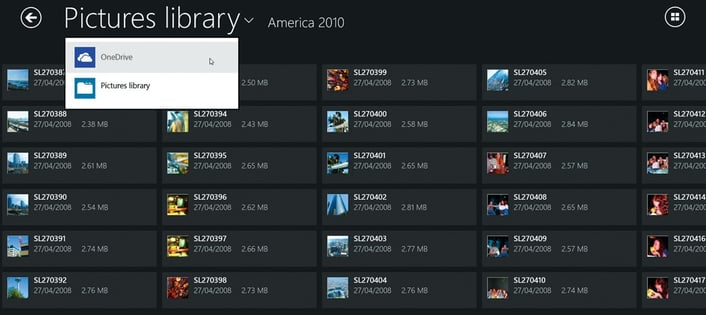
The default place for photos in Windows is the Pictures library, which you can access from File Explorer.
View Your Photos
Photos are displayed in the Photos app or Photo Viewer on the desktop. The real power is in the Photos app: photos are displayed in full screen, where you can edit your snaps, start slideshows or share them with friends.
Organize Photos
The best way to keep snaps organized is to put them in clearly named folders in the Pictures library. The Photos app will then use these names to create an album of your memories, which you can swipe or click through.
Import Photos
- Connect your camera, smartphone or tablet to your PC using the USB cable and open the Photos app from the Start screen.
- Swipe in from the bottom edge to see the application commands, or if you’re using a mouse and keyboard, just right-click anywhere inside the main screen, and tap or click Import. Windows 8.1 will scan your camera and show all of your snaps in a long list with a small preview.
- Tap or click the device you want to import from and then swipe or click each photo and video you want to import from the list.
- Tap or click Import to have them copied to your Pictures library.

Once you’ve connected your device, the Photos app will scan it for photo files.
- Hot Tip: Before you can start sharing with your favourite social media service, you need to download it as an app from the Windows Store and make sure you’re logged in. Once that’s done, you’ll find it in the Share charm list.
Sharing Photos Using The Charms Bar
- To start sharing, open the Photos app. Go to the folder containing the photos you want to share. Access the Charms bar and choose Share. The app you’re using to share, be it Facebook or Twitter, will be listed.
- Choose the app you want to use from the list, and it will open inside the Photos app, taking up the right-hand side of the screen. Use the service as normal.
Upload Photos To OneDrive
The OneDrive service, which provides Windows 8.1’s cloud storage, is a great way to back up your photos. Because your OneDrive folders are baked into Windows 8.1 like any other hard drive, you can store your photos online. Find the folder within OneDrive, right-click and choose Include in library, followed by the Pictures option.

Make OneDrive A Pictures Library
Find the folder within OneDrive, right-click and choose 'include in library' followed by the Pictures option. It will now behave exactly as the traditional method, but instead of being on your PC’s hard drive, it’s safely stored in the cloud.
- Hot Tip: If you import from a camera that contains images you’ve already copied to your PC, they will still appear in the list, but Windows 8.1 will detect them and they won’t automatically be selected, to prevent duplication.
- A big new feature of Windows is Apps. To get to grips with everything that's available from day one, click here.
- Once you're done with photos, you might want to start working with videos. Click here for some advice on using Windows Media Player.
- For a detailed breakdown of the Microsoft Excel's interface just click here.


