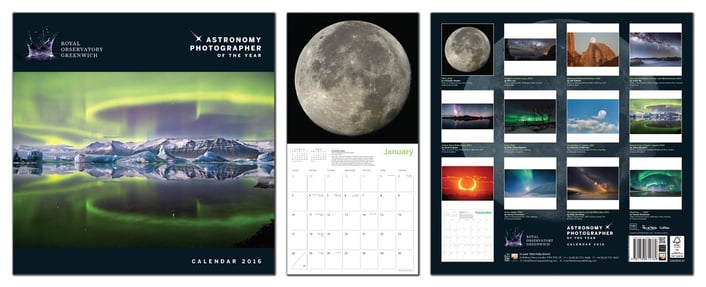
For full-on spectacle, our 2016 calendar made in conjunction with the Royal Observatory Greenwich is right up there. Boasting the sensational shots of talented photographers from around the world, we've compiled twelve of the most stunning images of the night sky around. Today's blog shows off a few of these incredible shots, plus comes with a bit of info on how you might capture your own.
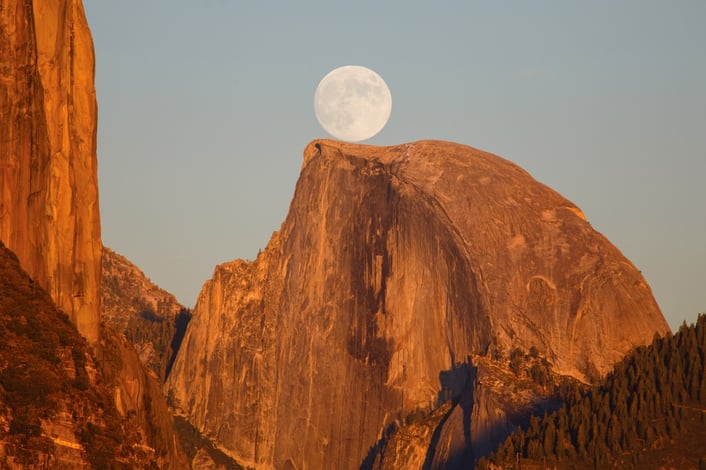
Moonrise Behind Half Dome - Jeff Sullivan, 2012
Taken at Yosemite National Park, California, USA
This awesome shot perfectly captures how we occasionally view the moon. However, if you've ever taken out your camera-phone and tried to photo it, you'll notice the effect is lost. Why is that?
The simplest explanation is to do with compressing the elements of your shot. Photographers with telephoto lenses (those really long ones), are able to take in a lot more details – especially ones that are very far away. If you were to move backwards from a person you were photographing they would become smaller. But as the moon is so far away it won't make any difference. So, to recreate the shot above, all you need to do is experiment with zoom. By zooming in from far away you can increase the size of your subject in the foreground whilst preserving the details of the background (such as a large moon). All cameras need a bit of tweaking for individual results, but with good enough equipment you should soon see how the natural power of a telephoto lens can crush the distance between the foreground and background.
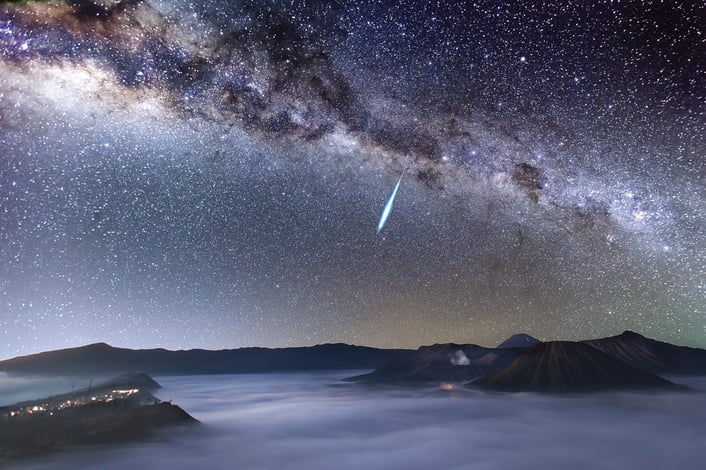
Eta Aquarid Meteor Shower over Mount Bromo – Justin Ng, 2013
Taken at Mount Bromo, Bromo Tengger Semeru National Park, Indonesia
Focussing on the stars is not as awkward as you might think. Providing you have a good enough lens, to get sharp images of the stars a good start is setting your lens to an infinity focus (that's basically the furthest setting). The distance between you and the stars is so immense that you'll rarely find lenses with enough power to have adjustment settings for multiple objects that are thousands of miles away (unless maybe you work at NASA).
The shot above also captures a meteor. It looks great, but should you want to capture one of your own, that's where adjustments may come in to play. Of course every camera is different and will need to be set to your own particular judgement on the night, but depending on the meteor's size, you may want to consider dialling back your focus by one stop. It's a hard thing to predict, but if you want a large meteor (like the one pictured) to look really sharp, you might decide it's OK to lose a little bit of quality on the stars in the background.
Night time photography is a delicate balancing act and experimentation often yields the best results. If you can get out a few nights before a meteor shower you want to shoot, that would be best.
For a more in-depth look at photographing meteors, check out this useful article.
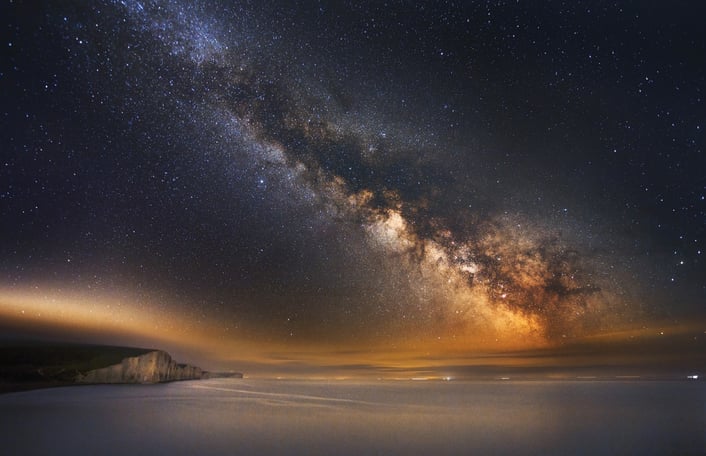
The Seven Sisters and the Milky Way – Chap Him Wong, 2014
Taken at Seven Sisters cliffs, Seaford, Sussex, UK
This charming image captures the Milky Way in astonishing detail. Great shots like this actually do happen overnight, but it will likely require all of the night.
Among many other factors, great night-time photography boils down to using long exposure to the maximum advantage. What does this mean? Well, you know when you hear that 'ker-chunk' sound when you take a photo? That's the shutter opening and closing. In the daytime, less than a second is all you need. This is because all of the available sunlight burns onto the film (or sensor) of the camera very quickly, and if it were left any longer all that would be left is white. Of course at night there is far less natural light, so photographers are required to leave their shutter open for long periods of time and let the faint light of the stars become clearer over time.
The problem with using this technique is that it will encompass movement. Have you ever seen a cool time-lapse video like this? It's possible to observe the star's movement over the course of a night, but in a photo that creates lines that move across the frame. Photographers overcome this in many different ways, such as high ISO performance on expensive cameras or stitching multiple shots together, but sometimes one might choose not to disguise this effect. For example it blends all movement together, which is why the sea looks so soft in the photo above. Keep reading to see another use of the effect below.
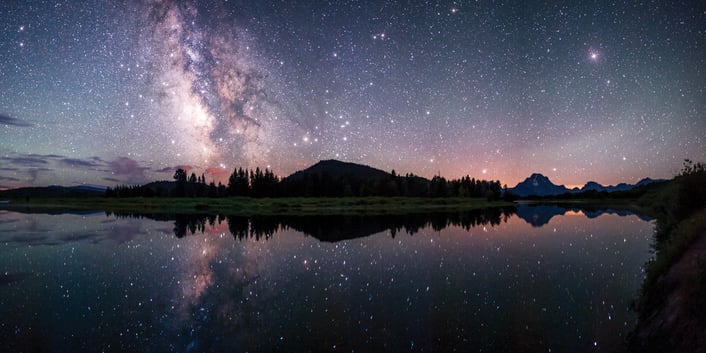
Oxbow Bend Reflections – David Kingham, 2013
Taken at Grand Teton National Park, Wyoming, USA
As mentioned above, long exposure takes the movements of something – in this case: water – and renders a single version of it in the final photo. Providing the water is relatively still this will result in a glassy reflection. As you can see, this is great way to mirror the sky in a way that's impossible to do in the daytime.
Of course, this requires the photographer to restrict any movement on the camera itself. If it shakes or is knocked over, the shot is ruined. So caution is the name of the game. Providing you have a sturdy tripod, a remote control for your camera is a necessary piece of equipment to own. It stops you from interfering with the camera, as even something as innocuous as pressing the capture button could be enough to sabotage your shot.
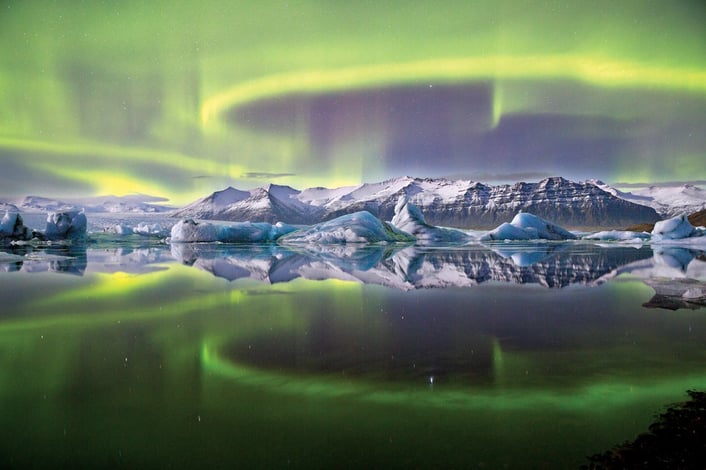
Aurora Over a Glacier Lagoon – James Woodend, 2014
Taken at Jökulsárlón, Vatnajökull National Park, Iceland
Finally we come to a dazzling photo of the Aurora Borealis. This will require experience of all the techniques mentioned above to capture perfectly. The correct point of focus for the constantly shifting rings, the sharpness of high ISO equipment, the lovely reflections in the water, plus many more we haven't had time to mention.
This astonishing light show is provided courtesy of electrically charged particles from the sun that change after colliding with gases in our atmosphere. If that doesn't quite make sense to you, don't worry – you're not alone. But it does highlight how unique the occurrence is among other elements that can be found in the night sky. If possible, get plenty of experience before you attempt to capture something like this, camp out overnight with friends and experiment with the particular settings (and limitations) of your equipment. If you're able to hone your photography skills and make a trip somewhere up north to take your own aurora shot, you might just find yourself a contender for next year's Royal Observatory Greenwich, Astronomy Photographer of the Year competition!
If you were inspired by these images, there's plenty more in our 2016 calendar. We've collected some of the best snaps from the 2014 competition, meaning you can enjoy a jaw-dropping image on your wall every day on the month. Take a closer look by clicking here. Or browse the rest of our 2016 calendars here.
All photographs are © their respective photographers.

